SYSTEM REQUIREMENTS
1. Your AutoCAD installation must have the following commands available:ADESETCRDSYS
ADEDEFDATA
ADEATTACHDATA
MAPEXPORT
2. You must assign a geographic coordinate system to your drawing to interface with global latitude and longitude. You must have the ADESETCRDSYS command available. This is easiest if you choose a public coordinate system early and set it using a program like Civil 3D. There is no way around this, because GIS is inherently built around being globally correct about coordinate systems. You can check your coordinate system by using the GEOMAP command (if you have it) to make sure you really are where in the world you think you are.
PROCESS OVERVIEW
What we are going to do is1. Define AutoCAD data "tables" with fields (like columns)
2. Attach the AutoCAD tables to AutoCAD objects
3. Fill out the data fields for each object
4. Export the AutoCAD objects with AutoCAD data to a GIS shape file with GIS tables.
STEPS
Let's attach and export Parcel Name and Parcel Zoning data to some polylines. We will create a PARCEL table with a NAME column and a ZONING column.DEFINE THE DATA
Use the ADEDEFDATA command: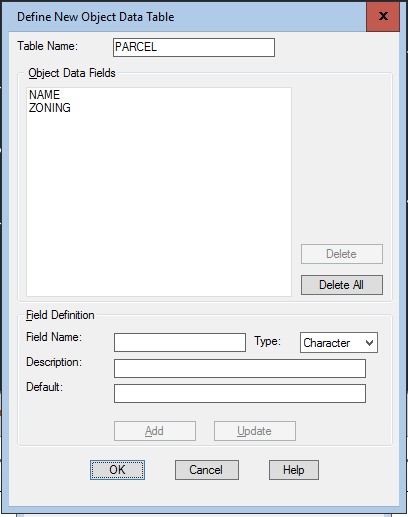
Enter the table name "PARCEL".
Enter a field name "NAME", choose Character as its Type, and click Add.
Enter another field name "ZONING", choose Character as its type, and click Add again.
(You may have to click outside the Field Name box to get the Add button active.)
Click OK to finish the definition of this data table.
Click Close to finish defining tables.
ATTACH THE DATA
Use the ADEATTACHDATA command:
Click Attach to Objects <, then select the object to have the data attached.
EDIT THE DATA
Fill in the data for each object using PROPERTIES.

EXPORT THE DATA
Make a folder for your GIS export. I will export to the Desktop\GIS-Parcel folder.Use the MAPEXPORT command:
Choose ESRI Shapefile (*.shp) file type, browse to the place you want to put your export, and enter "Parcel" for the Shapefile name.
In the Selection tab of the MAPEXPORT form, I chose Polygon and Select manually. Then I picked the polylines that have the data.


Click Create Unique Key Field to be polite to your GIS person so there is a unique id for each polyline.
In the Options tab of the MAPEXPORT form, hopefully you can leave your Coordinate conversion as you previously set it. To be polite to your GIS person, check the box to treat closed polylines as polygons. Then click OK.

No comments:
Post a Comment